Introduction to WMI Basics with PowerShell Part 2 (Exploring WMI using WMI and CIM Cmdlets)

In the previous blog post I covered how to explorer WMI using a GUI tool, now lets look at how to explorer WMI first using the WMI Cmdlets that are found in PowerShell v2 and PowerShell v3, then we will look at how to use CIM Cmdlets that where introduced in PowerShell v3 and the improvements Microsoft did to make using WMI even better in PowerShell v3.

Exploring WMI with WMI Cmdlets

Lets first lets look at the WMI Cmdlets that are available to us using the Get-Command cmdlet:
Get-Command -noun wmi* 

PS C:\> Get-Command -Noun wmi*

CommandType Name ModuleName
----------- ---- ----------
Cmdlet Get-WmiObject Microsoft.PowerShell.Management
Cmdlet Invoke-WmiMethod Microsoft.PowerShell.Management
Cmdlet Register-WmiEvent Microsoft.PowerShell.Management
Cmdlet Remove-WmiObject Microsoft.PowerShell.Management
Cmdlet Set-WmiInstance Microsoft.PowerShell.Management

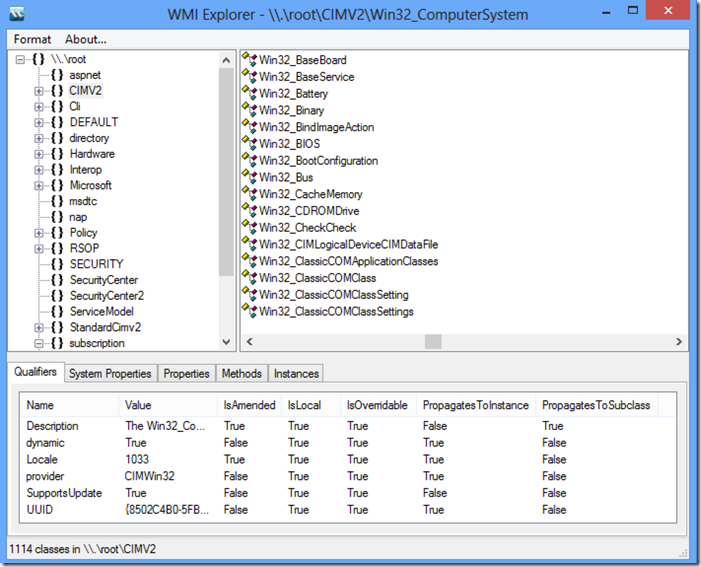
When working with WMI Cmdlets the most used one is the Get-WmiObject. Lets start by exploring and enumerating the different Namespaces. On the GUI this are the ones shown in a folder structure:

image

Lets look at all the Namespaces under Root by looking at the __namespace class:

Get-WmiObject -Class __Namespace -Namespace root | select name 

PS C:\> Get-WmiObject -Class __Namespace -Namespace root | select name

name
----
subscription
DEFAULT
CIMV2
msdtc
Cli
nap
SECURITY
SecurityCenter2
RSOP
StandardCimv2
WMI
directory
Policy
Interop
Hardware
ServiceModel
SecurityCenter
ThinPrint
Microsoft
aspnet

Now that we enumerated the namespaces under root we can look at the other namespaces by just appending them to the original namespace we queried allowing us to navigate the namespaces:

Get-WmiObject -Class __Namespace -Namespace root\CIMV2 | select name 

PS C:\> Get-WmiObject -Class __Namespace -Namespace root\CIMV2 | select name

name
----
Security
power
ms_409
TerminalServices
Applications

Now lets look at enumerating the Classes under the namespace, this is done by using the –list parameter. The list parameter does provide one flexibility most free GUI do not provide and this is filtering the class names using wildcards:

 Get-WmiObject -list *account* 

PS C:\> Get-WmiObject -list *account*


NameSpace: ROOT\cimv2

Name Methods Properties
---- ------- ----------
MSFT_NetBadAccount {} {SECURITY_DESCRIPTOR, TIME_CREATED}
Win32_Account {} {Caption, Description, Domain, InstallDate...
Win32_UserAccount {Rename} {AccountType, Caption, Description, Disabled.
Win32_SystemAccount {} {Caption, Description, Domain, InstallDate...
Win32_AccountSID {} {Element, Setting}

To list all the classes we just use * as the wildcard to have it list all classes, we can choose what name space to enumerate using the –namespace parameter.

Get-WmiObject -list *sensor* -Namespace root\cimv2\power 

PS C:\> Get-WmiObject -list *sensor* -Namespace root\cimv2\power


NameSpace: ROOT\cimv2\power

Name Methods Properties
---- ------- ----------
CIM_Sensor {RequestStateChan... {AdditionalAvailability, Availability, AvailableRequestedStates,...
CIM_NumericSensor {RequestStateChan... {Accuracy, AdditionalAvailability, Availability, AvailableReques...

To get details on a class it is not as simple as a single command:

(gwmi -list win32_service -Amended).qualifiers | Select name, value | ft -AutoSize -Wrap

PS C:\> (gwmi -list win32_service -Amended).qualifiers | Select name, value | ft -AutoSize -Wrap

Name Value
---- -----
Description The Win32_Service class represents a service on a Win32 computer system. A service application conforms to
the interface rules of the Service Control Manager (SCM) and can be started by a user automatically at
system boot through the Services control panel utility, or by an application that uses the service functions
included in the Win32 API. Services can execute even when no user is logged on to the system.
DisplayName Services
dynamic True
Locale 1033
provider CIMWin32
SupportsUpdate True
UUID {8502C4D9-5FBB-11D2-AAC1-006008C78BC7}

To simplify the process of getting information on a class I recommend that you create a function like the following and place it in your user PowerShell profile in %UserProfile%\My Documents\WindowsPowerShell\profile.ps1 :

function Get-WMIClassInfo

{

param(

[string]$className

)

(Get-WmiObject -list $className -Amended).qualifiers | Select-Object name, value

}

This will make the function available to aid in getting information about classes:

 Get-WMIClassInfo win32_process | ft -AutoSize -Wrap 

PS C:\> Get-WMIClassInfo win32_process | ft -AutoSize -Wrap

Name Value
---- -----
CreateBy Create
DeleteBy DeleteInstance
Description The Win32_Process class represents a sequence of events on a Win32 system. Any sequence consisting of the
interaction of one or more processors or interpreters, some executable code, and a set of inputs, is a
descendent (or member) of this class.
Example: A client application running on a Win32 system.
DisplayName Processes
dynamic True
Locale 1033
provider CIMWin32
SupportsCreate True
SupportsDelete True
UUID {8502C4DC-5FBB-11D2-AAC1-006008C78BC7}

In WMI a class can have 2 types of states:


  • Class it self with its own list of Static Methods and Properties.
  • Class Instances  these are the representation of state of several components of the OS or Hardware that are reference under the class.

One good way to illustrate this would be to look at the Win32_Process class, lets look at the class it self for thise we use with the Get-WmiObject cmdlet the –list paramter and the name of the class to get only the class itself and look at the methods we have available:

 Get-WmiObject -list win32_process | Get-Member -MemberType Method 

PS C:\> Get-WmiObject -list win32_process  | Get-Member -MemberType Method


TypeName: System.Management.ManagementClass#ROOT\cimv2\Win32_Process

Name MemberType Definition
---- ---------- ----------
Create Method System.Management.ManagementBaseObject Create(System.String Commandline ...

As we can see we only have one and it is to create a process. We can even use it to create say a notepad.exe process:

$win32proc = Get-WmiObject -list win32_process

$win32proc.Create("notepad.exe")

PS C:\> $win32proc = Get-WmiObject -list win32_process
PS C:\> $win32proc.Create("notepad.exe")


__GENUS : 2
__CLASS : __PARAMETERS
__SUPERCLASS :
__DYNASTY : __PARAMETERS
__RELPATH :
__PROPERTY_COUNT : 2
__DERIVATION : {}
__SERVER :
__NAMESPACE :
__PATH :
ProcessId : 3332
ReturnValue : 0
PSComputerName :

A return value of 0 means that it ran successfully and notepad should pop in you taskbar on Windows. When we look at instances we just use the –Class parameter with the Get-WmiObject cmdlet and give it the class we want to get the instances off, when we look at the methods we see we get a different set of methods since we are now working with an instance of each of the running processes on the system:

 Get-WmiObject -Class win32_process | Get-Member -MemberType method 

PS C:\> Get-WmiObject -Class win32_process | Get-Member -MemberType method


TypeName: System.Management.ManagementObject#root\cimv2\Win32_Process

Name MemberType Definition
---- ---------- ----------
AttachDebugger Method System.Management.ManagementBaseObject AttachDebugger()
GetOwner Method System.Management.ManagementBaseObject GetOwner()
GetOwnerSid Method System.Management.ManagementBaseObject GetOwnerSid()
SetPriority Method System.Management.ManagementBaseObject SetPriority(System.Int32 Priority)
Terminate Method System.Management.ManagementBaseObject Terminate(System.UInt32 Reason)


Exploring WMI with CIM cmdlets

We can see on the latest versions of Windows (Windows 8 and Windows 2012) that Microsoft is advancing its implementation of an open standard for management with Common Information Model (CIM) by integrating it with Windows Remote Management v3 that are part of the Windows Management Framework 3. We can see this in the new Server Manager tool where it uses WinRM for management on Windows 2012. WinRM being based on Microsoft implementation of WS-Management Protocol, a standard Simple Object Access Protocol (SOAP)-based, firewall-friendly protocol that allows hardware and operating systems, from different vendors, to interoperate. This is a shift to provide more interoperability with other platforms and products and Microsoft provides a new set of cmdlets for this.

We can use the Get-Command cmdlet to list the CIM cmdlets that are available in PowerShell v3:

 Get-Command -module CimCmdlets 

PS C:\> Get-Command -module CimCmdlets

CommandType Name ModuleName
----------- ---- ----------
Cmdlet Get-CimAssociatedInstance CimCmdlets
Cmdlet Get-CimClass CimCmdlets
Cmdlet Get-CimInstance CimCmdlets
Cmdlet Get-CimSession CimCmdlets
Cmdlet Invoke-CimMethod CimCmdlets
Cmdlet New-CimInstance CimCmdlets
Cmdlet New-CimSession CimCmdlets
Cmdlet New-CimSessionOption CimCmdlets
Cmdlet Register-CimIndicationEvent CimCmdlets
Cmdlet Remove-CimInstance CimCmdlets
Cmdlet Remove-CimSession CimCmdlets
Cmdlet Set-CimInstance CimCmdlets

Another advantage in addition to using WinRM and also being able to connect to other platforms like Linux or Network equipment that conforms to the CIM standard Microsoft added tab completion for class names and properties in the CIM cmdlets allowing for simpler discovery of classes.  To list namespaces we would use the Get-CimInstance cmdlet, we can use the tab completion by doing Get-CimInstance __name<tab> and have it auto complete it:

Get-CimInstance __namespace 

PS C:\> Get-CimInstance __namespace

Name PSComputerName
---- --------------
Security
power
ms_409
TerminalServices
Applications

If we do not specify a namespace with the –namespace parameter it will enumerate the default one of Root\CIMv2.

For enumerating classes we use the Get-CimClass cmdlet:

 Get-CimClass -ClassName *account* 

PS C:\> Get-CimClass -ClassName *account*


NameSpace: ROOT/CIMV2

CimClassName CimClassMethods CimClassProperties
------------ --------------- ------------------
MSFT_NetBadAccount {} {SECURITY_DESCRIPTOR, TIME_CREATED}
Win32_Account {} {Caption, Description, InstallDate, Name...}
Win32_UserAccount {Rename} {Caption, Description, InstallDate, Name...}
Win32_SystemAccount {} {Caption, Description, InstallDate, Name...}
Win32_AccountSID {} {Element, Setting}

As we can see Microsoft even made it simpler for us by showing the Class Methods and Class properties. But in addition to allowing us to search by class name we can also search by property name and method name giving us more flexibility because there is so much less to type:

 Get-CimClass -MethodName create 

PS C:\> Get-CimClass -MethodName create


NameSpace: ROOT/cimv2

CimClassName CimClassMethods CimClassProperties
------------ --------------- ------------------
Win32_Process {Create, Terminat... {Caption, Description, InstallDate, Name...}
Win32_ScheduledJob {Create, Delete} {Caption, Description, InstallDate, Name...}
Win32_DfsNode {Create} {Caption, Description, InstallDate, Name...}
Win32_BaseService {StartService, St... {Caption, Description, InstallDate, Name...}
Win32_SystemDriver {StartService, St... {Caption, Description, InstallDate, Name...}
Win32_Service {StartService, St... {Caption, Description, InstallDate, Name...}
Win32_TerminalService {StartService, St... {Caption, Description, InstallDate, Name...}
Win32_Share {Create, SetShare... {Caption, Description, InstallDate, Name...}
Win32_ClusterShare {Create, SetShare... {Caption, Description, InstallDate, Name...}
Win32_ShadowCopy {Create, Revert} {Caption, Description, InstallDate, Name...}
Win32_ShadowStorage {Create} {AllocatedSpace, DiffVolume, MaxSpace, UsedSpace...}

For getting the instances of a class we use the Get-CimInstance, as you can see in the WMI cmdlets the Get-WmiObject is the Swiss Army knife that allows you to do most of the  tasks related to WMI while on CIM the tasks have been split in to cmdlets. Lets use the cmdlet to get all the instances for Win32_DiskDrive that represent each of the disk on the system:

PS C:\> Get-CimInstance -ClassName Win32_DiskDrive | fl


Partitions : 2
DeviceID : \\.\PHYSICALDRIVE0
Model : VMware, VMware Virtual S SCSI Disk Device
Size : 64420392960
Caption : VMware, VMware Virtual S SCSI Disk Device

Now when it comes to the use of methods with CIM cmdlets the flexibility we had with WMI cmdlets is sadly missing, with WMI cmdlets when we got the class or the instances of the class as part of the object that was returned we also had methods to each that allowed us to invoke the method and have actions taken against what the class instace represented, with CIM objects we need to use the Invoke-CimMethod cmdlet. Lets look at the same example we used above where we created a notepad.exe process:

Invoke-CimMethod Win32_Process -MethodName create -Arguments @{CommandLine='notepad.exe'} 
x

PS C:\> Invoke-CimMethod Win32_Process -MethodName create -Arguments @{CommandLine='notepad.exe'}

ProcessId ReturnValue PSComputerName
--------- ----------- --------------
2684 0

As it can be seen when a method is invoked with the CIM cmdlet we must provide it the name of the method and if this method takes a parameter we must specify the parameter in a Hash where the key is the parameter name. In WMI cmdlets we would use the invoke-wmimethod, they are similar in operation and getting used to CIM cmdlets just takes a little practice if you have been using WMI cmdlets on PowerShell v2 for a while. Lets look terminating all notepad.exe processes with WMI cmdlet and then with CIM cmdlets so you can see the similarities:

# WMI Cmdlet example

Invoke-WmiMethod -Class win32_Process -Name create -ArgumentList notepad.exe

Get-WmiObject win32_process -Filter "name='notepad.exe'" | foreach {$_.terminate()}


# CIM Cmdlet example

Invoke-CimMethod Win32_Process -MethodName create -Arguments @{CommandLine='notepad.exe'}

Get-CimInstance Win32_Process -Filter "name='notepad.exe'" | Invoke-CimMethod -MethodName terminate

PS C:\> Invoke-WmiMethod -Class win32_Process -Name create -ArgumentList notepad.exe


__GENUS : 2
__CLASS : __PARAMETERS
__SUPERCLASS :
__DYNASTY : __PARAMETERS
__RELPATH :
__PROPERTY_COUNT : 2
__DERIVATION : {}
__SERVER :
__NAMESPACE :
__PATH :
ProcessId : 2668
ReturnValue : 0
PSComputerName :

PS C:\> Get-WmiObject win32_process -Filter "name='notepad.exe'" | foreach {$_.terminate()}


__GENUS : 2
__CLASS : __PARAMETERS
__SUPERCLASS :
__DYNASTY : __PARAMETERS
__RELPATH :
__PROPERTY_COUNT : 1
__DERIVATION : {}
__SERVER :
__NAMESPACE :
__PATH :
ReturnValue : 0
PSComputerName :

PS C:\> Invoke-CimMethod Win32_Process -MethodName create -Arguments @{CommandLine='notepad.exe'}

ProcessId ReturnValue PSComputerName
--------- ----------- --------------
3316 0


PS C:\> Get-CimInstance Win32_Process -Filter "name='notepad.exe'" | Invoke-CimMethod -MethodName terminate

ReturnValue PSComputerName
----------- --------------
0

As you can see the cmdlets operate very similarly.

I invite you to use the Get-Help cmdlet against each of the cmdlets mentioned here to learn more about them. As always I hope you found the blogpost useful.
PowerShell Basics–Filtering and Iterating over Objects

Now that we know that commands in PowerShell produce objects and that they have properties we can now start comparing, filtering and manipulating the objects.

Operators

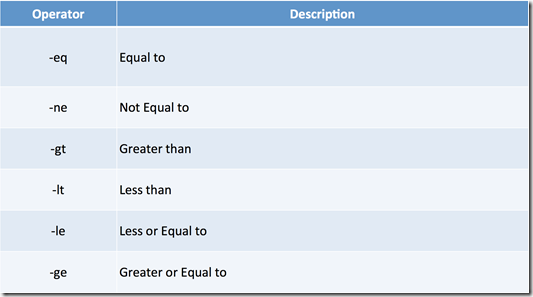
For the manipulation of objects we will cover first the Operators in PowerShell since they are used against Objects and the Properties of objects. You will notice that the operators for comparison operators in PowerShell will differ from those in Ruby, Python, Perl and other scripting languages and mimic more those found in Unix type shells so a Bash programmer will feel at ease with the operators in PowerShell. When comparisons are done PowerShell has the special variables $True and $False to represent Boolean values.

image

One thing to keep in mind when working with PowerShell is that it is case insensitive so when we are doing comparisons and we want them to be case sensitive we have to explicitly specify to be case sensitive.

PS > "hello" -eq "HELLO" 
True
To make a comparison be case sensitive one only need to add a c to the comparison.
PS > "hello" -ceq "HELLO" 
False
PowerShell will try to convert the types of the element for evaluation by analyzing them. It ill use the value on the left as the type to convert the type on the right.
PS > 1 -eq "1" 
True

There are also operators for comparing collections and type:

image

One common mistake by many starting with PowerShell is that many times -contains and -in operators are used by mistake to search in strings. Their use is for Arrays or Hash lists.

PS > "a","b","c" -contains "b" 
True 

PS > "b" -in "a","b","c" 
True
PowerShell also allow also to compare by type. The operators are: Type operators are mostly used to make sure the proper type is used in scripts
C:\PS> (get-date) -is [datetime] 
True 

C:\PS> (get-date) -isnot [datetime] 
False 

C:\PS> "9/28/12" -as [datetime] 
Friday, September 28, 2012 12:00:00 AM 

We can join several comparisons using Boolean Operators and each comparison operator is considered a subexpression.

image

Subexpressions can be parenthetical or cmdlets that return a Boolean. An example would be :

PS C:\> ((1 -eq 1) -or (15 -gt 20)) -and ("running" -like "*run*") 
True

Selecting Objects

The Select-Object cmdlet allows for:

  • Selecting specific objects or a Range of objects from an ordered collection of objects that contains specific properties.
  • Selecting a given number from the beginning or end of a ordered list of objects.
  • Select specific properties from objects.
  • Creation of new object with properties Renaming object properties .

The Select-Object cmdlets allows us to select from a collection of objects the ones we want when we specify the index position of the item. Just like all programing languages we start our count with 0.

PS > Get-Process | Sort-Object name -Descending | Select-Object -Index 0,1,2,3,4 

We can also use the range notation, this will return an array of number for the range and we can pass those to the index parameter.

PS > Get-Process | Sort-Object name -Descending | Select-Object -Index (0..4)

Select the first number of objects, the last number of objects or even skip a certain number.

PS > Get-Process | Sort-Object name -Descending | Select-Object -first 5 

The select-object cmdlets also allows us to create and rename an objects property, this is very useful when the property name is not to descriptive and when we are passing from one comdlet to another where the next cmdlet accepts and processes objects by Property Name. The way it works is that we create a hash with 2 values in it, one is Name which is the name we ant for the property and the other is expressions which is a script block whose returning value will be set as the value of the property we named.

PS > Get-Process | Select-Object -Property name,@{name = 'PID'; expression = {$_.id}} 

One thing that we have to be very careful with when using Select-Object is that when we select property names using it actually generates a new object of the same type with only those properties that we selected and strips out the rest. Depending on the chaining of cmdlets using the pipeline this could cause us to loose a property we may need further along the pipeline chain so do keep it in mind and be careful.

Iterating over Objects

Iteration is the method by which several objects in a collection are processed one by one and actions are taken against them. In PowerShell, there are 2 methods for iterating thru objects and are often confused:

  • ForEach-Object cmdlet and its aliases foreach and %.
  • foreach( in ){} statement.

As you can see the main reason for the confusion is that Foreach-Object has an alias of foreach which can be confused with the statement. Each method will take a collection and process the objects in a Scriptblock but each behaves differently, however and its use will vary case by case.

Lets start with Foreach-Object. The ForEach-Object cmdlet takes a stream of objects from the pipeline and processes each and it uses less memory do to garbage control, as objects gets processed and they are passed thru the pipeline they get removed from memory. The cmdlet takes 4 main parameters:

  • Begin <Script block> executed before processing all objects
  • Process <Script block> executed per each object being processed
  • End <Script block > to be executed after all objects have been processing all objects.
  • InputObject <PSObject> to take actions against. Typically this is taken thru the pipeline.

The ScriptBlocks parameters are also positional

PS C:\> 1..5 | ForEach-Object { $Sum = 0 } { $Sum += $_ } { $Sum } 
15 
To skip to the next object to be process in ForEach-Object the keyword Continue is used. For exiting the loop inside of a ForEach-Object the break keyword is used.
C:\PS> $Numbers = 4..7 
C:\PS> 1..10 | foreach-object { if ($Numbers -contains $_) { continue }; $_ } 
1 
2 
3 

Now lets take a look at the at the Foreach statement. The foreach( in ){} statement places on each iteration an element of a collection in to memory first and then processes each. (Not good for extremely large collections on memory constrained systems). Since the collection being worked on is loaded in to memory it tends to be faster than the ForEach-Object cmdlet.

To skip to the next object to be process in foreach statement the keyword continue is used. For exiting the loop inside of a foreach statement the break keyword is used.

  • The foreach statement has a special variable called $foreach with 2 special methods that can be used: $foreach.MoveNext() to skip to the next element in the collection and continue to process the next element in the collection. Returns a Boolean true value that should be handled.
  • $foreach.Current to represent the current element being processed

The foreach statement can even be used in a interactive shell session:

PS >foreach ($i in (1..10)){ 
>>    if ($i -gt 5){ 
>>        continue 
>>    } 
>>    $i 
>> } 
>>
1 
2 
3 
4 
5 
As always I hope you have found this blogpost informative and useful. Thanks.

Introduction to WMI Basics with PowerShell Part 1 (What it is and exploring it with a GUI)

For a while I have been posting several ways I use WMI (Windows Management Instrumentation) in my day to day and in consulting but have never covered the basics. Talking with other people in the security field and in the system administration worlds they seem to see WMI as this voodoo black magic that only a few who venture in to it master it. Do to the programmatic way that one retrieves information from it I see why some who have not coded or scripted may be afraid of it, so I will take my best attempt at showing the basics of it in a simple easy to understand way.

What is WMI?

WMI is the Microsoft implementation of Web-Based Enterprise Management (WBEM), with some enhancements in the initial version of it, WBEM is a  industry initiative to develop a standard technology for accessing management information in an enterprise environment that covers not only Windows but also many other types of devices like routers, switches, storage arrays …etc. WMI uses the Common Information Model (CIM) industry standard to represent systems, applications, networks, devices, and other managed components. CIM is developed and maintained by the Distributed Management Task Force (DMTF).

All of that sounds pretty but when Microsoft developed the first versions of WMI they use DCOM (Distributed Component Object Model) wish if a proprietary  Microsoft Technology, so the standards and cross compatibility just took a back seat at the time, on more recent versions of the operating system with Windows Management Framework 2.0 and above MS started to include more and more of the standards and shifter to using WS-Management SOAP-based protocol thru their WinRM (Windows Remote Management) protocol.

We can look at WMI as a collection of objects that provide access to different parts of the operating system, just like with PowerShell objects we have properties, methods and events for each. Each of these objects are defined by what is called MOF  (Manage Object Format) files that are saved in %windir%\System32\wbem with the extension of .mof. The MOF files get loaded by what is called a Provider, when the Provider is registered he loads the definitions of the objects in to the current WMI Namespace. The Namespace can be seen a file system structure that organizes the objects on function, inside of each namespace the objects are just like in PowerShell in what is called Class Instances and each of this is populated with the OS and Application information as the system runs so we always have the latest information in this classes.

Namespaces are organize in a hierarchical way where \root is the top level for all other namespaces. The default namespace where most of the other namespaces and classes are located is root\CIMv2 on Windows Kernel 6.x on Kernel 5.x it is Default\CIMv2. Some are installed by default and others are only available when specific applications are installed.
In summary each Namespace contains Classes, these have:

  • Methods Actions that can be taken.
  • Properties Information that can be retrieved.
  • Instances Instances of the class objects (services, Processes, Disks) each instance with Methods and Properties.
  • Events are actions that WMI can monitor for and take action when they happen.

Caveats of WMI

Now WMI is great, do not get me wrong, but sadly it does have some caveats the main ones being:

  • Not all classes are available on all versions of Windows. Check
  • Some applications even from MS have Providers in one version and not in another (Office) and in some cases they even change the properties and methods.

In other words if you plan on running WMI queries against a series of hosts that may be of different versions of Windows or a specific application do make sure you test and validate your results. This goes the same for Architecture if you are testing x64 or x86.

Exploring WMI with a GUI

There are currently several GUI tools out there that can be use to explorer WMI so once can decide what class, instance (object) or event one wants to work with. For many administrators one of the favorite tools to explore WMI has been the standalone WMIExplorer.exe from SAPIENs http://www.sapien.com

image
Microsoft updated to 1.1 their WMI Administrative Tools http://www.microsoft.com/en-us/download/details.aspx?id=24045

image
Microsofts Scripting Guy WMIExplorer.ps1 http://gallery.technet.microsoft.com/scriptcenter/89c759b7-20b4-49e8-98a8-3c8fbdb2dd69

image
All tools provide a GUI way to explorer WMI but they tend to have some issues in common:

  • They tend to be slow since they parse all classes and namespaces when exploring
  • Filtering for information is not the best.

Each tool has it’s advantages and disadvantages my to favorites that I keep using time and time again is the Scripting Guy WMIExplorer.ps1 and the one from Sapiens, the Sapies the main differences is that that one is a binary and the other is in PowerShell, also the PowerShell one allow me to see help information about the class that the Sapiens tool does not, in the Sapiens tool I have to go to MSDN and read the WMI reference documentation http://msdn.microsoft.com/en-us/library/windows/desktop/aa394582(v=vs.85).aspx

Since this will be a series on using WMI in PowerShell I recommend you go with the PowerShell one first. To get up and running with it we start by selecting the code for the script and saving it as WMIExplorer.ps1

image

Since this is a script and more than likely we do not have a code signing certificate to sign it we must change out execution policy to allow the running of locally created scripts. We do this using the Set-ExecutionPolicy cmdlet from a PowerShell session that is running as Administrator.  The command would be:

Set-ExecutionPolicy -ExecutionPolicy RemoteSigned -Scope CurrentUser -Force 

In the example command above I’m setting it only for the current user (No need to allow other accounts to run scripts without signing) and I give it the parameter of force so as to execute it without letting the system ask me if I’m sure I want to enable it.

Once saved and the policy has been set we can execute the script from a console or from ISE, I recommend that you run it as a background job so it will not lock your current session this is done using the Start-Job cmdlet:

Start-Job -FilePath .\WMIExplorer.ps1

When the job is created you should be greeted by the following screen after a couple of seconds:

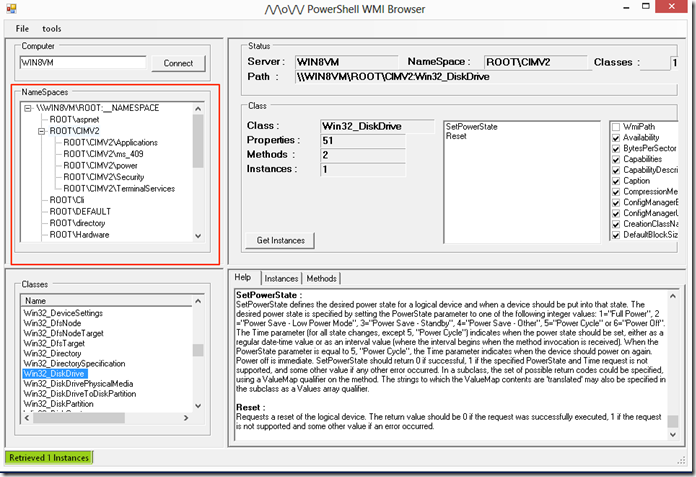
image

Do make sure you click on connect so it will start populating the information. When a class is selected detailed information about the class is populated so as to make it easier to identify what piece of information we want depending on what we want to do with class or instance of the class, the Help section will contain the information about the class and the definitions of the properties so as to know what each of those return.

image

When we select a method of the class you will be able to see what information the method provides and even see examples of use of the method.

image

You will notice that there are several classes available that we can pull information from, many of these start either with CIM or Win32 and have the same name at the end. The difference between these classes is that one uses the Common Information Model schema and the Win32 classes are called Win32 Enhanced classes, in other words they leverage the Win32 API for information, My personal recommendation when you see both use the Win32 one.

PowerShell uses WMI under hood quite a bit for many of it’s cmdlets. One good example is the Get-Hotfix cmdlet, if we look at the type we can see that it is returning a WMI object:

image

As we can see in the TypeName it is referencing System.Management.ManagementObject (same as WMI in .Net) and it is in the NameSpace root\cimv2 and the class name is win32_QuickFixEngineering if we do a query using the Get-WMIobject cmdlet we would get the same type:

image

On the net blogpost in the series we will go into how to navigate WMI with both the WMI and CIM cmdlets.

As always I hope you have found this information useful.

PowerShell Basics–Objects and the Pipeline

By now you would have noticed if you have been reading my other posts where I use PowerShell that it is not your typical Shell and that it behaves in a unique way when it comes to the output generated by the commands we issue in it, this is because PowerShell is an Object based Shell, this means that everything is an object. Those that have programed in Perl, Ruby, Python, C# or any other Objects based language know very well the power of objects, for those that come from a Bash, cmd.exe or any other regular text based shell you will notice that in PowerShell is a lot simpler to parse and use data, typically on one of this shells we are searching for strings, extracting the strings of text that we need and then piping them to something else, this can be very labor intensive. Lets start by defining what an Object is simple terms, an object is Data and it has 2 types of components:

  • Properties – Information we can retrieve and/or set by name.
  • Method – something we can have happen to the data, it can take arguments to determine what to do or to provide additional information.
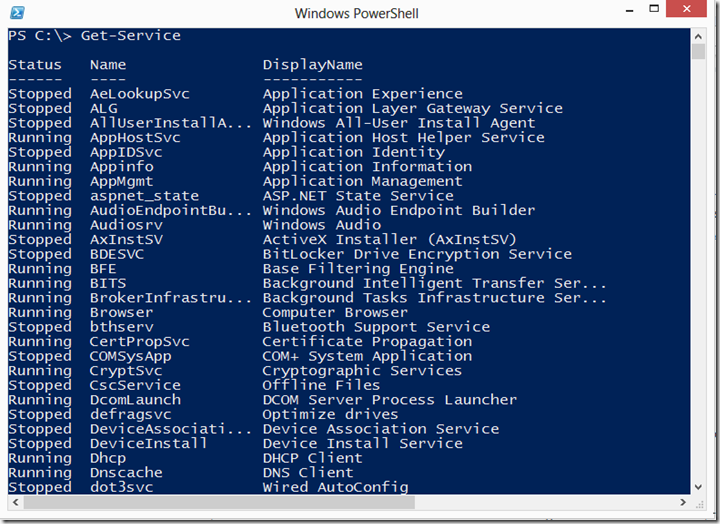
To better illustrate Objects and the advantages if offers versus a text based shell lets look at how it is used in PowerShell and why it is one of the foundations for it. Lets look at services. To get a list of services on the system we just do a Get-Service and we get the output, now lets dissect that output: image Man time PowerShell will show the output in a table format or in a list format, looking at a table format like the one above we can see each service is represented individually (as rows) and some information of each is shown (as columns). when we look at this each column represents a property and each row an individual object. But wait we know there has to be more to an service than this, right? well yes. PowerShell uses what is known as Format views for certain types of object so as to show what the creator of the cmdlet considers to be the most common pieces of information for use. To look at the Object be it from a command, cmdlet, function workflow ..etc the most common method is to pipe it to the Get-Member cmdlet to get a view
Get-Service | Get-Member

This will produce a list of:


  • Properties – Information about the object.
  • Methods – Things we can do to the objects.
  • ScriptMethods – Pieces of embedded code that will execute when called.
  • Events – Things that happen to an object we can subscribe to be notified when they happen.

It will also tell us what is the .Net Object Class it is being returned.

image

While using this you may noticed that for some outputs of commands you will see more than one Object Class, Get-Member is smart enough to only show the info for the unique classes that are returned. Lets look at the information we can get from a single object, for the example I will use the BITS service so as to not break my machine.  Lets start by saving it in to a variable so it is easier to manipulate. Variables in PowerShell are maded with a $ in the front just like in Perl .

$BITSSrv = Get-Service -Name BITS

Now lets start with the fun part, the methods. To see what we can do with the object we use the Get-Member cmdlet but specify that we want only the methods shown:

PS C:\> $BITSSrv | Get-Member -MemberType Method


TypeName: System.ServiceProcess.ServiceController

Name MemberType Definition
---- ---------- ----------
Close Method void Close()
Continue Method void Continue()
CreateObjRef Method System.Runtime.Remoting.ObjRef CreateObjRef(type reque...
Dispose Method void Dispose(), void IDisposable.Dispose()
Equals Method bool Equals(System.Object obj)
ExecuteCommand Method void ExecuteCommand(int command)
GetHashCode Method int GetHashCode()
GetLifetimeService Method System.Object GetLifetimeService()
GetType Method type GetType()
InitializeLifetimeService Method System.Object InitializeLifetimeService()
Pause Method void Pause()
Refresh Method void Refresh()
Start Method void Start(), void Start(string[] args)
Stop Method void Stop()
WaitForStatus Method void WaitForStatus(System.ServiceProcess.ServiceContro...

As we can see there are several actions we can take against the service object, we can start, stop, pause, refresh (The object is only the state of what it represents at the given time we retrieved it). Wehn we look at the definitions we can see it shows us that some methods like Pause and Refresh do not take any arguments and others like Start can be called in several ways in some without us giving it arguments in others it tells us the type of class the method will take. Some can be deduce quite easily others we have to look in the MSDN Website for the class information (ServiceController Class)  do the way output is formatted we may loose some of the info we may need. for this we can use one of the Format Cmdlets to make it wrap the line so we can have a better look.

PS C:\> $BITSSrv | Get-Member -MemberType Method | Format-Table -Wrap


TypeName: System.ServiceProcess.ServiceController

Name MemberType Definition
---- ---------- ----------
Close Method void Close()
Continue Method void Continue()
CreateObjRef Method System.Runtime.Remoting.ObjRef CreateObjRef(type
requestedType)
Dispose Method void Dispose(), void IDisposable.Dispose()
Equals Method bool Equals(System.Object obj)
ExecuteCommand Method void ExecuteCommand(int command)
GetHashCode Method int GetHashCode()
GetLifetimeService Method System.Object GetLifetimeService()
GetType Method type GetType()
InitializeLifetimeService Method System.Object InitializeLifetimeService()
Pause Method void Pause()
Refresh Method void Refresh()
Start Method void Start(), void Start(string[] args)
Stop Method void Stop()
WaitForStatus Method void WaitForStatus(System.ServiceProcess.ServiceControlle
rStatus desiredStatus), void WaitForStatus(System.Service
Process.ServiceControllerStatus desiredStatus, timespan
timeout)

Lets stop the service:

PS C:\> $BITSSrv.Stop()

PS C:\> $BITSSrv.Status
Running

PS C:\> $BITSSrv.Refresh()

PS C:\> $BITSSrv.Status
Stopped

As it can be seen I forgot that when the object is in a variable it is just a representation at the moment it was saved. Let look at Parenthetical execution go get around this, when we wrap the command around ( ) we can use the properties and methods of the object it returns directly. 

PS C:\> (Get-Service -Name BITS).Start()

PS C:\> (Get-Service -Name BITS).Status
Running

Now since we are poling the information on each command we get the latest information.  You can notice from the examples that Properties do not require ( ) at the end of invocation and Methods do, just something to keep in mind, in fact using tab completion or the ISE it will remind you.

Let look at the properties:

PS C:\> Get-Service -Name BITS | Get-Member -MemberType Property


TypeName: System.ServiceProcess.ServiceController

Name MemberType Definition
---- ---------- ----------
CanPauseAndContinue Property bool CanPauseAndContinue {get;}
CanShutdown Property bool CanShutdown {get;}
CanStop Property bool CanStop {get;}
Container Property System.ComponentModel.IContainer Container {get;}
DependentServices Property System.ServiceProcess.ServiceController[] DependentServices ...
DisplayName Property string DisplayName {get;set;}
MachineName Property string MachineName {get;set;}
ServiceHandle Property System.Runtime.InteropServices.SafeHandle ServiceHandle {get;}
ServiceName Property string ServiceName {get;set;}
ServicesDependedOn Property System.ServiceProcess.ServiceController[] ServicesDependedOn...
ServiceType Property System.ServiceProcess.ServiceType ServiceType {get;}
Site Property System.ComponentModel.ISite Site {get;set;}
Status Property System.ServiceProcess.ServiceControllerStatus Status {get;}

You will notice that some of the properties have in the end {get;set} or only {get;} this means we can assign a value to the property of the same type as it is listed in the definition. Since PowerShell will only list some of the properties depending on the formatting it has defined. Do take in to account this is only for the instance of the object, we would not be changing the service it self but the representation we may have in a variable. To change the service itself it would have to be thru a Method.

The formatting of what is displayed is shown following the guidelines shown in the format.pmxml file for each type in the Windows PowerShell folder, for the service it would be in C:\Windows\System32\WindowsPowerShell\v1.0 since the view is sometimes limited and we want to do a quick browse of all that is in the properties we can use the formatting cmdlets to exposed all, I tend to use the Format-List cmdlet:

PS C:\> Get-Service -Name BITS | Format-List -Property *


Name : BITS
RequiredServices : {RpcSs, EventSystem}
CanPauseAndContinue : False
CanShutdown : False
CanStop : True
DisplayName : Background Intelligent Transfer Service
DependentServices : {}
MachineName : .
ServiceName : BITS
ServicesDependedOn : {RpcSs, EventSystem}
ServiceHandle : SafeServiceHandle
Status : Running
ServiceType : Win32ShareProcess
Site :
Container :

PipeLine

By now you would have noticed in this blogpost and others that the pipeline is used quite a bit in PowerShell. The typical pipeline in other shells will move the standard out of a command to the standard input of another:

image

In the case of PowerShell we are moving objects so there are 2 ways a cmdlet can receive commands from the pipeline:


  1. By Value – this is where the output of a cmdlet must be the same type as what the –InputObject parameter of another takes:
  2. By Property Name – This is when the object has a property that matched the name of a parameter in the other.

So by Value would be:

image

And when we look at the parameters in help we can identify them by looking of they accept from the pipeline and how:

image


By Property it would be:


image


and when we look at the help information for the parameter it would look like:

image

The examples above are from the Service cmdlets so we could just pipe the Get-Service cmdlet any of the other cmdlets for managing services:

PS C:\> gcm *service* -Module  Microsoft.PowerShell.Management

CommandType Name ModuleName
----------- ---- ----------
Cmdlet Get-Service Microsoft.PowerShell.Man...
Cmdlet New-Service Microsoft.PowerShell.Man...
Cmdlet New-WebServiceProxy Microsoft.PowerShell.Man...
Cmdlet Restart-Service Microsoft.PowerShell.Man...
Cmdlet Resume-Service Microsoft.PowerShell.Man...
Cmdlet Set-Service Microsoft.PowerShell.Man...
Cmdlet Start-Service Microsoft.PowerShell.Man...
Cmdlet Stop-Service Microsoft.PowerShell.Man...
Cmdlet Suspend-Service Microsoft.PowerShell.Man...

So this would allow us to do:

PS C:\> Get-Service -Name BITS | Stop-Service

PS C:\> (Get-Service -Name BITS).Status
Stopped

PS C:\> Get-Service -Name BITS | Start-Service

PS C:\> (Get-Service -Name BITS).Status
Running


I hope that you found this blog post in the series useful and on the next one we will cover how to filter and process the Objects generated so we can glue even more types of cmdlets together.

Verifying Patching with PowerShell (Part 2 Microsoft Hotfixes)

In this second part we will look at querying for Microsoft Hotfixes against a given array of hosts. This Workflow will differ a bit as you will see from the one I showed in my previous post do to changes and improvements I was requested by a friend doing consulting at a client, he quickly modified the workflow in the previous post to use a list of IP Addresses and modified it to check for Internet Explorer versions so as to aid him in a risk assessment for a customer. On this one I took it a bit further and came with the following requirements:

  • Take an array of either computer names or IP addresses instead of an object.
  • Provide the ability of using alternate credentials for connecting to WMI on the remote hosts.
  • Test each given hosts to see if port 135 TCP is open.
  • Return an object with the patch information and a state of Installed or not Installed so as to be able to parse easier.

PowerShell provides 2 main ways to get patch information from a system:

  1. Get-Hotfix Commandlet
  2. Query to the Win32_QuickFixEngineering WMI class

In my testing Get-Hotfix when used inside of a workflow in PowerShell v3 tended to default to WinRM not allowing me to use DCOM as the method of communication. This became very annoying since not all customer environments will have WinRM running but are more than likely to allow DCOM RPC connection to their Windows Hosts. So I opted with the second option of using the Get-WMIObject to query the Class Win32_QuickFixEngineering . The command as the base for the workflow is rather simple:

Get-WmiObject -Class Win32_QuickFixEngineering -Filter "HotFixID='$($hid)'"

Where $hid holds the HotFix ID of the hotfix we want to test. With the Get-WMIObject cmdlet we can also give it the option of alternate credentials to use as well as a Computer Name to target.

The logic for the workflow is a simple one, we go thru each computer in the computers array in parallel and for each we check for the hotfix id

Workflow Confirm-Hotfix {

[cmdletbinding()]

param(


[parameter(Mandatory=$true)]

[psobject[]]$Computers,


[parameter(Mandatory=$true)]

[string[]]$KB


......


foreach -parallel ($computer in $computers) {

InlineScript {

foreach ($hid in $using:KB){

......

}

}


}

}

When using workflows there are several restrictions that make working with them very different than working say with a function specially when it comes to how to set parameters, use of variables and that positional parameters can not be use. Also the cmdlets that can be use are limited. This is why you will see me using the $using variable to pass variables to the script block that is the InlineScript. The use of InlineScript relaxes many of the rules that are imposed inside the workflow.

My Next task is to test if TCP Port 135 is open and set a timeout so as to be able to test quickly if the host is up or not before attempting to connect with WMI, the main advantage of this are:

  • Checks if the host is alive since most environments have firewalls on the PCs and servers that block ICMP Echo.
  • Checks that the proper port for WMI is open and if it is blocked and reset is send by a firewall.

Workflow Confirm-Hotfix {

[cmdletbinding()]

param(


[parameter(Mandatory=$true)]

[psobject[]]$Computers,


[parameter(Mandatory=$true)]

[string[]]$KB


......


foreach -parallel ($computer in $computers) {

InlineScript {

$TCPclient = new-Object system.Net.Sockets.TcpClient

$Connection = $TCPclient.BeginConnect($using:computer,135,$null,$null)

$TimeOut = $Connection.AsyncWaitHandle.WaitOne(3000,$false)

if(!$TimeOut) {


$TCPclient.Close()

Write-Verbose "Could not connect to $($using:computer) port 135."


}

else {


Try {

$TCPclient.EndConnect($Connection) | out-Null

$TCPclient.Close()

foreach ($hid in $using:KB){

......

}


}


Catch {


write-verbose "Connction to $($using:computer) on port 135 was refused."

}

}


}

}

The rest of the Workflow is just creating the object and passing the credentials. The final workflow looks like:


Workflow Confirm-HotFix {

[cmdletbinding()]

param(


[parameter(Mandatory=$true)]

[psobject[]]$Computers,


[parameter(Mandatory=$true)]

[string[]]$KB,


[System.Management.Automation.PSCredential] $Credentials


)


foreach -parallel ($computer in $computers) {

Write-Verbose -Message "Running against $($computer)"

InlineScript {

# Move credentials in to the inline script for easier manipulation

$creds = $using:Credentials

# If none are provided create an empty PSCredential Object to force use of current user token.

if (!$creds){

$creds = ([PSCredential]::Empty)

}

$TCPclient = new-Object system.Net.Sockets.TcpClient

$Connection = $TCPclient.BeginConnect($using:computer,135,$null,$null)

$TimeOut = $Connection.AsyncWaitHandle.WaitOne(3000,$false)

if(!$TimeOut) {


$TCPclient.Close()

Write-Verbose "Could not connect to $($using:computer) port 135."


}

else {


Try {

$TCPclient.EndConnect($Connection) | out-Null

$TCPclient.Close()


# Check each computer for the info.

foreach ($hid in $using:KB){

Write-Verbose -Message "Checking for $($hid) on $($using:computer)"

$KBs = Get-WmiObject -class Win32_QuickFixEngineering -Filter "HotFixID='$($hid)'" -ComputerName $using:computer -Credential $creds

if ($KBs){

# Process each version found

Write-Verbose -Message "Hotfix $($hid) found on $($using:computer)"

$objprops =[ordered] @{'Computer'=$Using:computer;

'HotFix'=$hid;

'InstalledDate' = $KBs.InstalledOn;

'InstalledBy' = $KBs.InstalledBy;

'Description' = $KBs.Description;

'Caption' = $KBs.Caption;

'Installed'=$true}

[PSCustomObject]$objprops


}

else {

#If not found return an object with Installed False

Write-Verbose -Message "Hotfix $($hid) not found in $($using:computer)"

$objprops =[ordered] @{'Computer'=$Using:computer;

'HotFix'=$hid;

'InstalledDate' = "";

'InstalledBy' = "";

'Description' = "";

'Caption' = "";

'Installed'=$false}

[PSCustomObject]$objprops

}

}

}


Catch {


write-verbose "Connction to $($using:computer) on port 135 was refused."

}

}

}

}

}


Now we can use alternate credentials and have the workflow test for connectivity:

PS > Confirm-HotFix -Computers 192.168.10.20,192.168.10.1 -KB KB976902 -Credentials (Get-Credential acmelabs\administrator) -Verbose
   VERBOSE: [localhost]:Running against 192.168.10.1
   VERBOSE: [localhost]:Running against 192.168.10.20
   VERBOSE: [localhost]:Checking for KB976902 on 192.168.10.20
   VERBOSE: [localhost]:Could not connect to 192.168.10.1 port 135.
   VERBOSE: [localhost]:Hotfix KB976902 found on 192.168.10.20


   Computer              : 192.168.10.20
   HotFix                : KB976902
   InstalledDate         : 1/22/2013 12:00:00 AM
   InstalledBy           : NT AUTHORITY\SYSTEM
   Description           : Update
   Caption               : http://support.microsoft.com/?kbid=976902
   Installed             : True
   PSComputerName        : localhost
   PSSourceJobInstanceId : 3704d139-8328-4bd2-adcc-06bc994bf8b5

And since we are returning Objects and not text we can manipulate the results:

   PS C:\> $hosts = Get-ADComputer -Filter * | select -ExpandProperty name
   PS C:\> Confirm-HotFix -Computers $hosts -KB KB976902 | Format-Table -Property computer,hotfix,installed -AutoSize

   Computer HotFix   Installed
   -------- ------   ---------
   WIN801   KB976902     False
   WIN2K01  KB976902     False
   WINXP01  KB976902     False
   WIN2K302 KB976902     False
   DC02     KB976902      True
   WIN2K301 KB976902     False
   WINXP02  KB976902     False
   DC01     KB976902     False
   WIN702   KB976902      True
   WIN701   KB976902      True

This workflow is great for testing that the patch management solution deployed the patches and they applied, good for a quick risk assessment on Patch Tuesdays and confirming what a Vulnerability Scanner reports. I added the workflow to my PowerShell Security Module I keep meaning of one day finishing and documenting https://github.com/darkoperator/PowerShellSecMod/blob/master/PSSec/PSSec.psm1#L63

As always I hope you find this useful and informative, any feedback you may have are more than welcome Smile .